What is and how the Migration/Upgrade Wizard works?
Article ID: 181820
Updated On:
Products
Issue/Introduction
Question
What is and how the Migration/Upgrade Wizard works?
Environment
ITMS 8.x
Resolution
Answer
The Symantec Notification Server Migration Wizard is .NET Windows Forms application that will guide the user through the upgrade process.
When you upgrade from one version of the Symantec Management Platform (SMP Server) to a new one, you can migrate most of the SMP Server data. Symantec Installation Manager (SIM) manages the installation and uses Symantec Notification Server Migration Wizard to manage the data migration.
Symantec Notification Server Migration Wizard helps you migrate data from a SMP Server to another. The Migration Wizard lets you export the original data to a data store file. It then lets you import this data from the data store file into Symantec Management Platform.
The migration wizard lets you customize the data that you export and import. It uses exporters to export data and a corresponding set of importers to import data. Each product that has data to migrate has its own set of exporters and importers. When you export or import data, you can select the exporters or importers to use. You can also filter the data that an exporter or importer migrates. When you filter data, you select the specific data that you want to export or import.
Note: You cannot migrate managed computers.
When you migrate data, Symantec Installation Manager manages the migration process. With an on-box upgrade, it starts the migration wizard to export the data and later starts it to import the data. With an off-box upgrade, Symantec Installation Manager provides instructions for installing the migration wizard on the SMP Server computer. It also starts the migration wizard on the new Symantec Management Platform computer when you are ready to import the data.
The EXE for the migration wizard is NSUpgradeWizard.exe, and by default, it is in the C:\Program Files\Altiris\Upgrade directory. To run the migration wizard, you must be a member of the local administrators group.
The main components for this Migration/upgrade wizard are:
| File | Description |
| NSUpgradeWizard.exe | This executable is the user interface module of the upgrade framework. |
| StoreBrowser.exe | This executable is a utility that can be used to browse a data store. |
| Altiris.Datastore.dll | This assembly contains the implementation of the data store. |
| Altiris.ImportExportEngine.dll | This assembly contains the implementation of the core import/export engine. |
| NotificationServerUpgrade.config | This configuration file contains the list of exporters and importers for the Notification Server. |
A data store file stores SMP Server data. When you migrate the original SMP Server data to the new SMP Server, you first export the data to a data store file. You then import the data from the data store file into the new SMP Server. To export and import the data, you use Symantec Notification Server Migration Wizard.
By default, the data store file is saved in the C:\Program Files\Altiris\Upgrade\Data directory. It has an .adb extension, is easy to copy and back up, and is not dependent on SQL.
You can view the data in a data store file with the Store Browser. If you perform multiple imports, you can view the data to determine which data to import next. The data store file organizes the data by product. The data for each product is stored in tables. The name of each table is ProductName.TableName.
Migration/Upgrade Wizard Pages
The following section describes the various upgrade wizard pages.
Welcome Page
This is the welcome page for the upgrade wizard.
Basic Options Page
Use this page to select what type of data operation to perform.
This page allows the user to select what type of data operation to perform. Clicking next will cause the upgrade wizard to initialize the export/import engine.
Options
- Export data to the file store. Specify that the upgrade wizard should export data from the Notification Server to the specified data store. If the data store already exists it will be overwritten.
- Import data from the file store. Specify that the upgrade wizard should import data from the specified data store to the Notification Server.
- Data Store. Specify the data store to either export data to or import data from.
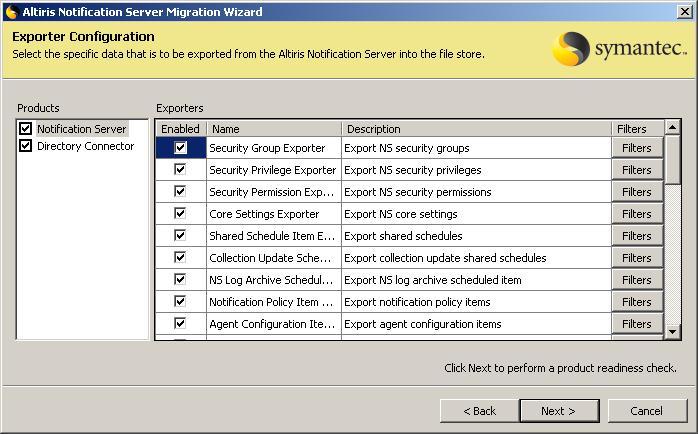
Exporter Configuration Page
Use this page to specify the exporter configuration options. This page is displayed only when exporting data to the data store.
This page allows the user to refine what data is to be exported to the data store.
Options
- Products. This lists the supported products that can export data. Each list entry corresponds to a product configuration file. A product and all of its exporters can be excluded from the export process by unchecking the product's checkbox.
- Exporters. This lists the available exporters for the selected product that can export data. An exporter can be excluded from the export process by unchecking the exporter's checkbox.
The Filters button for each exporter will display the Filters dialog, which displays the available filters for that exporter. This dialog allows a user to further refine what data the particular exporter will export.
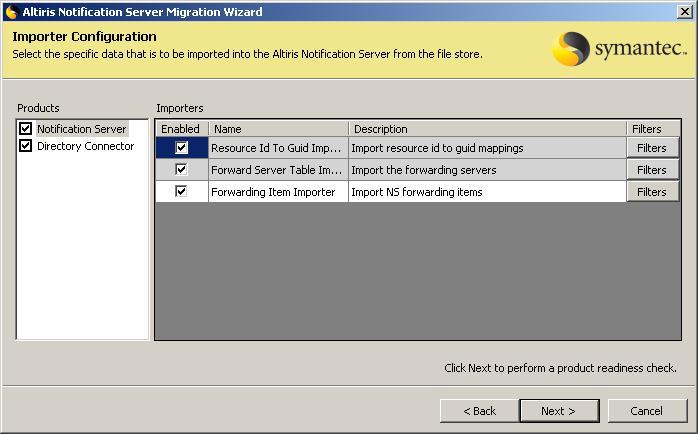
Importer Configuration Page
Use this page to specify the importer configuration options. This page is displayed only when importing data from the data store.
This page allows the user to refine what data is to be imported into the Notification Server.
Options
- Products. This lists the supported products that can import data. Each list entry corresponds to a product configuration file. A product and all of its importers can be excluded from the import process by unchecking the product's checkbox.
- Importers. This lists the available importers for the selected product that can import data. An importer can be excluded from the import process by unchecking the importer's checkbox.
The Filters button for each importer will display the Filters dialog, which displays the available filters for that importer. This dialog allows a user to further refine what data the particular importer will import.
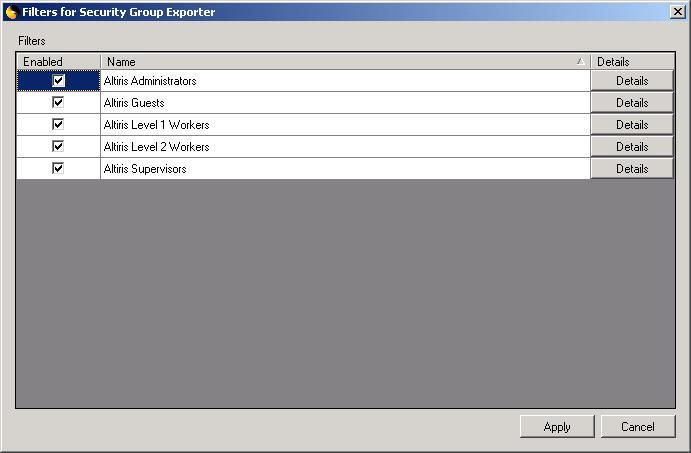
Filters Dialog
This dialog displays the available filters for the selected exporter or importer.
Options
- Filters. This lists the available filters for the selected exporter or importer. A filter can be excluded from the export/import process by unchecking the filter's checkbox.
The Details button for each filter will display the Filter Details dialog, which displays more information about the selected filter.
Filter Details Dialog
This dialog displays information about the selected filter.
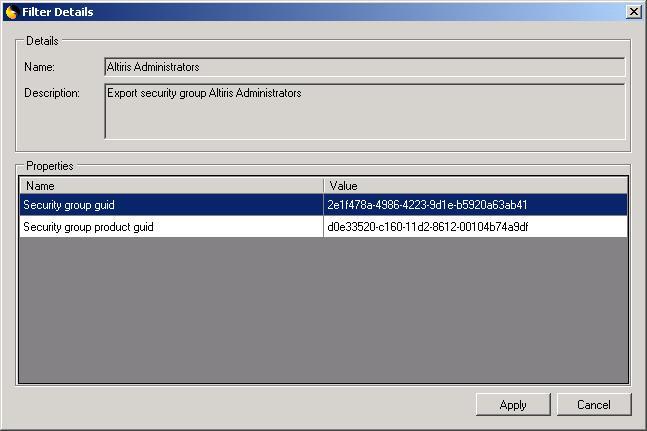
Options
- Name. The name of the filter.
- Description. The filter's description.
- Properties. This lists other properties that describe the filter. The properties that are listed here are those properties on the filter that have the FilterPropertyAttribute.
Product Readiness Page
This page displays the product readiness status of the machine that the migration is run on.
This page displays the following information:
- Solution migration baseline. The wizard will check that the solutions that are to be migrated meet the minimum baseline requirements. The wizard will use the supported products defined in the product's upgrade configuration file and the SupportedProduct attribute on the exporter/importer types to determine if the minimum baseline requirements have been met. It will display information detailing which installed solutions do not meet the minimum requirements.
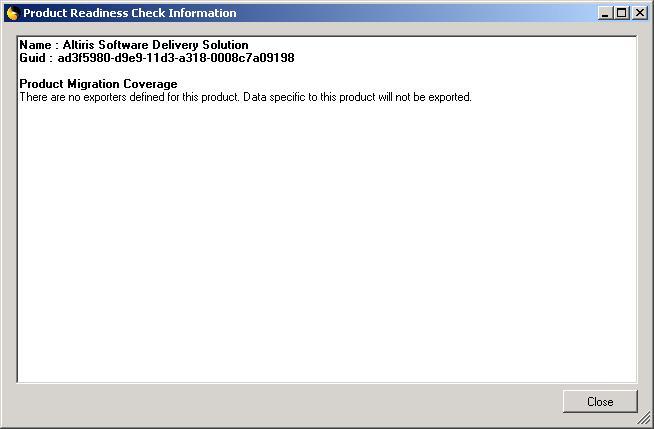
- Solution migration coverage. The wizard will check that all the installed solutions have a valid migration path. If a solution is installed but does not have any exporters defined, a message will be displayed. This is to notify the user that data for this solution will not be exported. During the solution migration coverage check, the wizard will ignore any product that is marked as unsupported in the product's upgrade configuration file. This is so that any products that are end-of-life and cannot be migrated do not show up in the migration coverage check.
Product Readiness Information Dialog
This dialog displays information describing why a particular readiness check has failed.
Summary Page
This page displays a summary of the actions that are to be performed.
Export / Import Progress Page
This page displays the progress of the export or import operation.
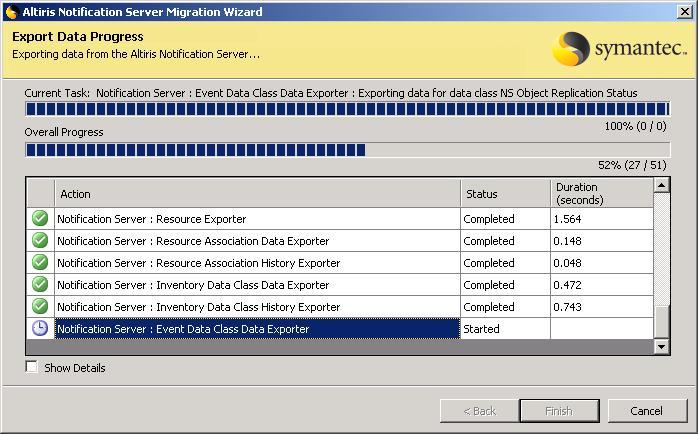
Options
- Current Task. This displays the name and the progress of the current task.
- Overall Progress. This displays the overall progress of the export/import.
- Show Details. This option will display more details about the export/import.
Additional Information
Feedback
